Before you start
What you need
- A computer with Docker Engine and the Docker Compose plugin installed and running.
- Enough free disk space for Docker images and uploaded media. Video processing and stored media can grow substantially.
- Internet access for the first container build.
- Terminal access in the unzipped
server/backendfolder.
Docker builds the Go API and Nuxt admin panel from source. You do not need to install Go or Node on the machine for this local Docker path.
Local installation
Run the server
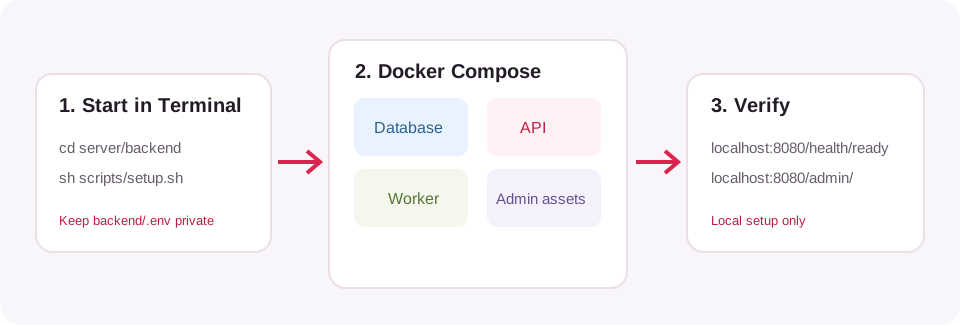
Open a terminal in the backend folder
From the unzipped package root, enter:
cd server/backendOn Windows, use a terminal with Docker available, such as PowerShell or WSL. The setup script uses a Unix shell; WSL or a Linux/macOS machine is the simplest path.
Start Docker, then run the setup script
sh scripts/setup.shThe script creates a private server/backend/.env, builds the API and admin assets, applies database migrations and starts the containers. The first build downloads dependencies and may take several minutes. Keep .env private.
Check the API
curl http://127.0.0.1:8080/health/readyA healthy response confirms that the API can start. If it fails, inspect container logs:
docker compose ps
docker compose logs api worker moderation migrateOpen the admin console
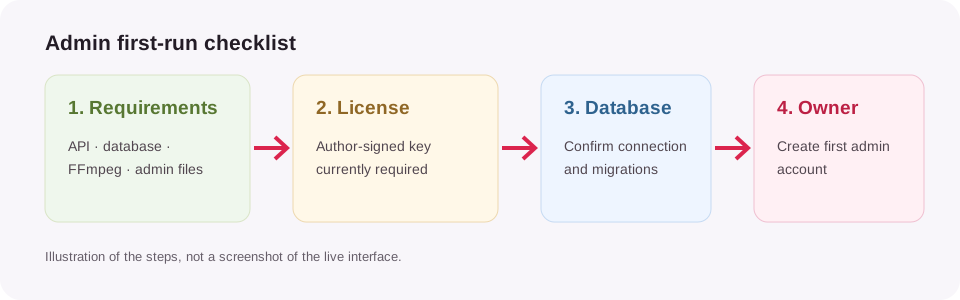
Open http://localhost:8080/admin/ on the same computer. The first-run wizard checks requirements, license, database and owner account.
Important gate
Admin license step
Copy your installation ID
The wizard shows an ID in the License step. Copy it exactly. The setup script already configures the public verification key for local setup.
Issue your key from the paid checkout
Return to your paid checkout order, or recover it with the paying wallet and transaction hash. In Get your activation key, paste the installation ID and use http://localhost:8080 as the admin origin. Select Issue activation key.
Finish the wizard
Copy the resulting key into the License key field and continue. A production deployment needs its own key bound to its exact HTTPS admin origin and installation ID. Your order includes one local development key and one production key. For a transfer, email lomi@amixmon.com.
Never paste a private signing key into the browser, repo or package. Only Amixmon holds the private signing key.
After local setup
Plan a public deployment
The local setup listens on loopback and is not a public internet deployment. Before accepting users, arrange:
- A domain and HTTPS reverse proxy for the API and admin console.
- Strong private database credentials and access limited to the server.
- Persistent media storage with off-server backups, and a tested restore.
- Production signing and provider configuration for the Android app.
- A signed installation entitlement and verification of your production origin.
- Monitoring, email delivery credentials if using recovery email, and an operational security review.
Use server/backend/README.md and server/docs/ for implementation details. The local setup script does not provision a public domain, HTTPS or backups.
Preserve data: Do not use docker compose down -v to update an installation; the -v flag removes persistent volumes.